Sunday, May 27, 2018

Making Concessions: Adjusting Automotive Living History to Function in the 21st Century

20th Century living history gets complicated... Most specifically, this complication applies heavily to those of us who use historic vehicles in our impressions, or in daily life. I own a replica 1929 Mercedes kit car, and an original 1924 Ford Model T. Both are enjoyable in their own aspects, and both lend something special to the experience. After having an opportunity to work with both, I have come to the conclusion that the ideal scenario is to make some concessions to automotive living history, as we do in many aspects of the reenacting hobby, in any time period.

My polar-opposite motor cars... The replica 1929 Mercedes is a care-free delight that I can drive anywhere for as long as I can tolerate the tight space. My 1924 Model T frequently has some mechanical issue, and it can't do highway speeds, but it's got a ton of room and it's got the full historical experience, though I must say, it's not difficult to get lost in the moment in either car.

Throughout many time-eras of historical reenacting and living history, we have come to accept certain concessions. For one thing, completely 100% correct reproduction fabric is a very rare thing indeed. It is virtually impossible to acquire correct linen, because the machines used nowadays are not the same as the ones that were used historically. This changes the very nature of the fabric itself. Historical linen doesn't wrinkle like modern linen does, because the fibers are left long, whereas nowadays, they are cut short to go through the processing machines that are also used for cotton. Furthermore, many fabric designs are "historically inspired", but not actual copies of historical patterned fabric. (Yes, there are some out there, but you'll pay LOADS of money for them, and they're pretty rare.) Having handled MANY historical garments, I can tell you that the quality of historical fabric, versus modern, is like night and day in most cases. It is also common practice to machine-sew your hidden inside seams and top-stitch by hand, even in periods where sewing machines did not exist. Why? Because no one will ever see it, and it's more economical and practical. Sure, I've made entirely hand-sewn garments, and they wear out just as fast as a machine-sewn one. Some folks even machine-sew the outside, but I can't bring myself to do this, unless it's on a garment that dates to a period when machines existed.

You wouldn't wear this immaculate, extant, rare driving costume on a dusty backroad, would you? Some cars are a little too valuable to risk. A pre-WWI, all original car doesn't need to be in city traffic. There's a place for everything. (Photo by FIDM Museum Blog; Motoring Duster, Silk: 1910-1915)

Now, there are virtually NO 18th Century reenactors who would even dream of wearing an original garment into the field. The garments are too rare, and too valuable for research. This is slowly becoming the norm across many genres of living history. The fabric is fragile, and clothing wears out. To some extent, this is also the case with pre-WWII vehicles, and certainly the case with pre-WWI vehicles. A pre-1916 automobile has survived two World War scrap drives, and over a century of well-meaning amateur restorers. One in truly original condition is such a rarity, that it probably belongs in the hands of a museum like the Fountainhead Antique Auto Museum in Fairbanks, Alaska, where the cars get proper maintenance and regular "exercise" to keep them in optimal shape. If a reenactor could even afford one of these rare cars, it's probably not the thing to take off-roading in the back 40, loaded with your motor camping gear.

This original 1912 Stutz Bearcat could certainly cruise at 60 mph, but at about a half a million dollars, I don't think any of us could afford it... Plus, where would I put my kitchen box? This is also a very rare and historically significant car, and should probably be preserved for future generations, not risked at highway speeds in modern traffic. (Photo from TopSpeed.com)

If you're like me, (and most reenactors that I know) you probably have difficulties with the idea of coughing up $5,000-$10,000 for a piece of reenacting equipment. This price range should get you a decent, running car that needs work. However, bear in mind the limitations of historic vehicles. We are all too used to packing our gear at the last minute, getting off work on a Friday, and driving 70 mph to our favorite reenactment event. You simply will not do that in a period car. Most automobiles made before 1930 have a speed range of 25-50 mph. Trucks, such as the TT and AA can't do more than 25 as a TOP speed, without serious modifications. Even the "dime-a-dozen", "common-as-mud" Ford Model T tops out at 45. (That's throttle wide open, and going downhill.) The implications of even driving a Model T on a 55mph highway are terrifying, since no one actually drives the speed limit anyway... 


If you have a full understanding that this is the experience, and you WILL need a trailer, (and a truck that can pull it) then you'll be just fine. Be prepared to learn everything you can about working on historic vehicles, because they will have issues that need fixing. If you plan to do a lot of touring, you'll need a complete spare set of rims and tires, extra tubes, spare carburetor, timer, tools, and in the case of Model T's, a spare coil and spare transmission bands are a good idea. You also need the knowledge of how to do most of these things, or travel with someone who does. It's a lot for an amateur to take on, but it can be done. Expect to invest at least $1000 per year into your antique car for at least the first 5 years. All of this may sound very grim, but once you get the bugs worked out, you can expect fairly smooth sailing for quite some time, and the experience will be full-on real. You won't be able to take a full car load up a steep hill without resorting to your lowest gear, and making your passengers walk alongside, but then, that's the true experience!

Even by the 30's, climbing steep hills in a car was still a big deal. This one did it, but it's not much of a car at all!
(Image from Popular Science Magazine, 1937)

Next, we need to talk about safety. THIS IS REALLY IMPORTANT, SO PAY ATTENTION!! 18th and 19th Century reenactors will be familiar with the process of safety checks on muskets and cannons, using proper charges, etc. Safety is never something that should be sacrificed for the sake of authenticity. Historical vehicles do not have adequate brakes. In most cases, they aren't suitable for stopping the car from full speed, and they never have a fail-safe. At the very least, you should install some form of backup braking system. There are many period aftermarket solutions that you can use, or you can upgrade to modern-style hydraulic disc brakes. This is the safest option, but it will require some basic machine-shop work to accomplish the task.

This is a "juice brake" kit from Texas T Parts designed for easily upgrading the brakes on your Model T to something more modern. This is a pricey kit, and a good machinist can do this themselves, but if you're not a machinist, it's worth it to cough up the cash for a kit like this. Alternatively, you can add Rocky Mountain brakes to your Model T for a period-correct solution. I believe the kit pictured here will also work on other early motor cars. (Photo from Texas T Parts)

Another problem with original cars is that the glass, if it has never been replaced, is plate-glass. This becomes a deadly shrapnel grenade in the case of an accident. Most glass shops will do the work pretty cheap. As it is flat glass, not curved, you can usually have laminated safety glass installed for about $50-$100 per window. (One reason in favor of a touring car over a closed car...)

Laminated safety glass is really important... Really!

Turn signals and brake lights did not come standard on most cars until after our period, so this is a concession you NEED to make. There was a time when people understood hand signals, but there are becoming fewer and fewer folks who remember that part of their driving test. I've even heard stories of police officers not knowing what they are. Furthermore, for the last century, cars have been capable of speeds up to 80 or 100 mph, but the roads didn't accommodate those speeds. Nowadays, I find there are many folks who don't think twice about cruising at 70 mph on a 55 mph highway. When you're doing 35, they're going twice your speed. If you are braking, they can't tell a difference, and they're likely in the middle of writing a "very important" text message at that moment... Having some bright brake lights "may" save you. The wiring diagrams are available online and the project is pretty simple. You don't even have to ruin the look of your period car, or upgrade to 12 volt systems in order to do it. This little electronic board will allow you to convert your 6-volt feed to 12 volt, but it will only operate LED lights. (They're brighter anyway...) You can buy smoked-lens mini lights for motorcycles, and they'll be very unobtrusive, and as LED, they're plenty bright. You'll need a brake light switch to attach to your pedal, and a blinker module and switch as well. It's not worth the risk. As we have all experienced in the living history field, the public are not the most observant folks around. However, on the road, they have the ability to kill you. Make yourself visible!

A recent incident involving a 1931 Model A and a modern driver who was distracted by texting while driving.
In this case, the car was actually parked, so brake lights wouldn't have mattered, but it's just as likely for this to happen while moving, so do everything you can to make sure your vehicle is visible. (Photo by William Smith)


Another safety factor to think about are seat belts. This is not something I personally consider necessary, because any altercation between a modern vehicle and a 90+ year old, wood-framed car is going to be disastrous, and lap belts probably won't help you. However, if you're like me, and you're traveling with your small children, the restraint will help keep them from hanging out the window, which is a constant battle, especially with active boys.

Kids love old cars, and I feel it's important to introduce them to them at an early age, but we must not forget that there is a certain aspect of danger and we should take whatever precautions we can to make them safe, even if it means sacrificing a little bit of the authenticity of the automobile. Picture from TIME magazine archives.) 

Now that you've been thoroughly terrified and sworn off owning a period automobile, let me tell you that once you get the bugs worked out, period cars are a lot of fun and very dependable. No matter how trustworthy it may seem though, it's always good to have a stash of tools and parts, because it's better to have them and not need them, than to need them and not have them. But now, lets say that you're not much of a gearhead, and the idea of doing anything beyond a simple oil change or tune-up is terrifying to you. Perhaps you don't want to have to buy a truck and trailer in order to take your car somewhere for an event. (Remember, antique automotive reenacting is similar in nature to portraying horse cavalry... It's expensive and requires a lot of care and investment in equipment.) Maybe you'd prefer to load all of your gear into your period car, and DRIVE it to the event? This is where you have to make serious concessions. -Let me point out here for all the haters, that this is not a shameful concession. It's all about getting out there and experiencing the past in whatever capacity you're most comfortable and capable.- You basically have two options: One is a replica car, built out of fiberglass or metal and wood, and set on a modern drivetrain. The other option is a "resto-mod", or a period car that has been modified. Let's explore those two options a little closer...

My replica Mercedes. It's only downfall is the size. It's a little tight with gear and at best, you can only get two people in it.

There are three types of replica cars. There are the cheap fiberglass kits that were made in scores during the 70's and 80's. I have one of these. They are fun, look decent, are ridiculously dependable, parts are readily available everywhere, and they can do interstate speeds. They are also very, very small, so pack light, don't plan on passengers, and after 3 hours of driving, they'll become quite cramped and uncomfortable. These include the Gazelle Mercedes, Bentley, Jaguar, and other affordable cars. They vary in price from $2000 to over $10k, depending on how much improvement has been done. They are usually built on Mustang II, Pinto, Chevette, or Volkswagen Beetle drivetrains. Another style is the Shay replica. Shay made almost exact replicas of the Ford Model A in the late 70's and early 80's. Sitting side-by-side, you can tell the difference, but at 10 feet away, they certainly look like Model A's. They are also built on the Pinto/Mustang II frames, so highway speeds are no problem. (There is also a rarely found 1929 Chevrolet fiberglass "Woodie" replica that is on an S-10 frame. They were made in the mid 1990's) These tend to fetch pretty good prices because they are more drivable than the smaller replicas, and more highway-ready than an actual Model A. Expect to pay $9k-$12k for one of these. The last genre of replicas are probably the best, but very hard to find for sale. These are cars that are hand-built by enthusiasts. Most commonly, they are speedsters, so not the best thing for camping with... However, these are built from scratch, often using a mixture of both antique, and reproduction parts. Sometimes they use souped up original drivetrains, but often, they'll use a slightly newer engine, transmission, and rear end, and give it the "look" of the period. 70's and 80's straight-6 motors can be used, while others prefer the flathead look  and emissions-free cleanliness of a 1950's straight eight. Attention to detail is paramount in projects like this. If it doesn't look like what it's trying to emulate, it will look terrible. The devil's in the details. A handmade replica car can run anywhere from $10k to $30k, depending on what it is.

This was intended to be a "replica" of the Stutz Bearcat pictured above. As you can see, it's nowhere near the mark. While this car would certainly be a lot of fun, I'm sure, it's not at all what you want to be rolling up to the motor camp in. (Picture from Craigslist ad)

Now let's look at what I consider to be the ideal choice for the individual who wishes to drive to the event! Resto-Mods are not "hot rods" as we know them today, but rather a car that has had some hot-rodding done, but isn't changed from its original appearance. Often times, these are cars that have been properly restored, and are visually period, but have had major work done under the hood. This is comparable to a reenacting garment that is machine-sewn on the inside, and hand-sewn on the outside! The engine might be bored .30 over, upgraded with aluminum pistons, 12-volt electrics, modern carburetor, and often the transmission and rear end have been changed and "juice brakes" installed. This car will also have all the safety features properly installed as well. A good resto-modder will do some quality machine work and make sure that the rear-end overhaul doesn't change the way the wheels attach. Too often a good resto-mod is ruined by the S-10 or Mustang II wheels that have to go on it because the axles were changed. Quality work can be done, but it's best to find one that has already had quality upgrades, because paying a machinist to do that kind of work is very costly. A well-done resto-mod with everything completed should fetch anywhere from $15k-$30k. It's costly, yes, but you'll be able to do anything you want to with it, and future expense will mostly just be maintenance. If you can afford it, a properly completed car (whether original or resto-mod) is the way to go.

 A very well-done resto-mod 1929 Chandler Royal 8 that looks right on the exterior and interior...
...but has a lot of modifications under the hood and chassis, including performance and safety upgrades.

If you're working on a budget, and you don't need a lot of space, I'd recommend picking up a running Gazelle Mercedes kit. They are by far the most prolific, and therefore, they are quite affordable. The VW based ones are cheapest, but somewhat underpowered. However, one that needs interior, and/or has a bad gelcoat can be picked up for around $2000. If you can, spend a little more and get one with a Mustang II engine. The suspension is much better, and the engine is more powerful and more dependable. From there, you can build it however you wish. (Or find a good, completed one for around $8000) If you need more room, you're going to have to spend a little more money. However, if you're handy with wood, consider buying something that has a front-end and drivetrain, but no body, and build a woodie, or delivery wagon/huckster on that frame. The most important thing (and reenactors should be familiar with this concept) is to determine exactly what you need/want from the start and build toward that. Otherwise, you'll spend a lot of time and money on cars that don't make you happy. The bottom line is understanding what you want to get out of the hobby. If you want to enjoy the drive, camp "in a style following the period", and you don't want to buy a truck and trailer, then a replica or resto-mod is the way to go. If you want the "full, immersive historical experience", then you'll need to haul your machine to events on a trailer (unless local enough to drive backroads), and be prepared for anything, because that's what happened "back then". Remember that it took about 3 months or more to drive across the USA in 1923. If you're driving an original car, don't be in any sort of hurry. And finally, let me reiterate... DON'T SACRIFICE SAFETY FOR AUTHENTICITY!


Happy trails!!


If you're interested in joining in on some 1920's-era motor camping adventures, check out the Amalgamated Order of Motor Campers on Facebook!


Sunday, April 15, 2018

Introducing "Mabel" - Our 1924 Ford Model T


"Mabel", our 1924 Ford Model T Tudor

A few months ago, we added a new member to the family. For over a year, I'd been trying to sell an 1890's horse-drawn carriage that I'd picked up in college. The carriage was a true "barn find", rescued from a collapsing corncrib in Kentucky. It was a mess, but still a very rare piece. I had dreamed of restoring it to its former glory, but funds and time put the project on hold. However, over 10 years or so, I did manage to repaint it, replace the wheels, and make it functional enough that we did get to use it in a film project a few years ago. It was fun, but I knew I'd never have the money or the pasture space for a pair of suitable horses to pull it. So, it was time to let it go.

Trade the horse-and-carriage for a Model T? How appropriate!
(Apparently black with red wheels was a popular scheme for everything...)


Long story short, after a little trading around, I eventually re-homed the carriage and replaced it with a 1924 Ford Model T. Ironically, the "T" was painted in the same colors as the carriage! The 94 year-old car was only in slightly better condition that the carriage when I got it, so I knew I'd have my work cut out for me. She wasn't running when I picked her up, but she had new tires and seemed mechanically sound. The previous owner swore that it had run 6 months ago, but it was 17 degrees when I came to get it, and neither of us knew how to start a very cold Model T at the time. (I have since learned how to deal with this malady.)

After getting the car running, and driving her around a bit, our family decided that she needed a name. We chose "Mabel" because it fit the period and seemed like an appropriate name for a feisty old lady. This is the story of our adventures thus far.

Many long nights have led to a functional car. Many more long nights will hopefully lead to a pretty car someday!

Mabel came home in our cargo trailer that we use for business. Though she fit fine in the trailer, she was too tall to get through the doorway, so we had to let the air out of the rear tires to clear the door. We strapped her down, and headed 2 hours home to squeeze her in the garage.

Fresh out of the trailer after getting her home! At this point, she doesn't run and is covered in dust and the interior is full of half-chewed hickory nuts and chipmunk nests. I don't care. I have a Model T!

There's something you should know about Model T's, if you don't already. They are fairly primitive machines. Henry Ford found a system that worked in 1908, and he prolifically produced millions of them. Though the "T" did get some creature-comfort upgrades between 1908 and 1927, most of the changes made were to make them cheaper to produce. Every year, the Model T got cheaper to buy. This contributed to their popularity. However, there were no major upgrades to the powertrain during the 19-year model life. Therefore, driving and maintaining a 1924 Model T, isn't much different than a car 15 years older. Basically, I had to ignore everything I knew about working on cars and take a crash-course in "Model T Mechanics" via YouTube, Facebook groups, and friends I'd met who also have Model T's. I've learned so much in just a few short months!!

This is what a fully-restored one looks like. Pretty, but I don't want to have to worry about scratching the paint.
I don't think I'll go for a showroom resto.

I should probably take a moment to shout out to those who have been so helpful. First, my friend Bob, who advised me on many things and helped keep me calm when I was worried about various mechanical maladies. He also sent me a copy of the Model T Repair Manual, which has been an incredible resource! I'd also like to mention Linus, who told me what to look for as potential major problem areas and helped me gain a lot of peace of mind about the condition of my car. And then there's Kim, who I met through the local Model T club. He invited me over to his workshop and helped me out by adjusting my coils and helping me find some parts that were proving difficult to locate. My friend Marcus also helped out by spending many late evenings handing me tools and helping to get the car running. He also didn't fret when the car broke down, which it did a lot in the first few trips out. We have had the pleasure of becoming "Model T guys" together, which has been a lot of fun. I also benefited immensely from the YouTube videos by Mitch Taylor about working on the Model T. He also has an excellent website at www.fordmodelt.net. I highly recommend the Model T Ford Club of Facebook group for anyone interested in owning a Model T. They are very helpful folks! Another useful webpage is Steve Jelf's "Dauntless Geezer". Lots of great info there.

The Model T "bible" for repairs and re-furbishing. 


Now, back to learning how Mabel functions! So, the first thing I had to learn was that Model T's use a standard SAE 30 weight oil, just like your lawn mower. This oil doesn't move so well at low temperatures, so what happens is the oil settles between the clutch plates and becomes very thick and slow. This basically "glues" the clutch together, so even though it's in neutral, the car is still in gear. To get around this, you have to jack up one rear wheel, chock the other, and then you can start the car "in gear". This results in a terrifying situation where the rear wheel is spinning, sometimes fairly fast, while up on a jack stand. After about 5 minutes, the engine is warm enough that the oil is flowing properly and you can throw on the brake and unlock the clutch. Why does this work? Well, because the engine and transmission share the same oil. The transmission has bands that engage the transmission in various ways, including two forward speeds, reverse, and brake. Yes, the brake is on the transmission, not the wheels! (It does have a parking brake on the rear wheels, but that's not for slowing down.) So, once we learned this, we were able to make it run! It was an incredibly exciting moment! It occurred at about midnight in the garage one evening. I could not contain my excitement, so the very first time I drove a Model T was in the dark after midnight. There are no interior lights, and in fact, only one gauge on the dash, which is not lit either. On top of that, there are three closely-spaced pedals on the floor that are not in the arrangement that we "modern drivers" are used to. Therefore, driving in the dark is a challenge all of its own. Probably not the best "first-time" for a beginner, but I made it halfway around the yard before it ran out of gas! Hurrah!! Up to this point, all "driving" was purely theoretical and based on YouTube videos. Actual driving was quite different!

This photo was taken the very first time we got her running. A few minutes later I took a terrifying, but exhilarating "midnight ride" around the yard until the fuel ran out.

So now that we understood how to make it run, we began to start her up every couple of days. Finally we decided to take her next door to the state park and go for a trial run. My driving was still a little shaky. Think 16-year-old with a learner's permit... That's pretty much how it felt. But, I was getting the hang of it, slowly but surely. Unfortunately, it seemed very underpowered, even for a Model T. It would choke its way up the hills at 3 miles per hour, and stutter on the straightaways. To make matters worse, the fuel shut-off valve was worn out, and the vibrations of the engine would slowly close the valve, shutting off all fuel after about 5-10 minutes. I knew we needed more garage time. Eventually, I discovered the problem, with a little help from my friend Bob. He advised me to check to make sure I had spark on all four cylinders. I did not. I discovered that the coils were vibrating out of the box and causing me to lose connection. She was running on two cylinders. No wonder she was weak and sluggish!!

The primitive Model T power plant. 20 horsepower, generating a top speed of 45mph.


I got her functional just in time to take her to a local 20th Century camp-out, where she was the star of the show! She ran pretty well all weekend, but I learned two things. One, I need to keep more air in the tires. 55-60psi works pretty well, not the 44psi that was stamped on the side of the tire. We rolled the rear tire off the rim and had a fun adventure changing the tire in the rain, but all was good anyway. The other thing I learned was that she won't go up a steep hill with 5 men in the car. The roughly 1000 lbs of passengers was just too much for the little engine. I probably could have done it if I'd let half the guys walk, but the engine died and I was rolling backwards and it was just easier to turn around and go back. Now that I have more driving experience, I think I know what all I did wrong. Fortunately, there were no catastrophes! For more about the group and the camp-outs we do, check out the Amalgamated Order of Motor Campers on Facebook!

Everybody loves "Mabel"!
Even when she loses a tire...

The next project was to fix the rear emergency/parking brakes. (The steep hill experience drove me to make this a priority.) This was no simple task, as I first had to learn exactly HOW to remove the rear wheels! Like I said, you have to ignore everything you know about cars to work on one of these... After getting it apart, I found that there was only one brake shoe. The other one was missing, and the backing plate had been damaged at some point and brazed back together with the most terrible of shoddy work. I can only assume that this was done in the Great Depression Era, as it looks like it was done in a barn by an incompetent farm hand with a bench grinder and a brazing torch who was just trying to make it "look like it wasn't broken" rather than making it functional. I sourced the necessary parts, (found out that my rear axle is actually from a 26-27 Model T) re-lined the brake shoes, and eventually got it put back together. I also had to replace the entire fuel line, clean the tank, and rebuild the "sweet potato", as the under-the-tank fuel valve and "filter" is called.

Brake drum, attached to the wheel. 
Very questionable backing plate repair. I don't know why they did this, or how they broke it in the first place!
Speaking of interesting repairs, this is someone's waist belt, sewn into a replacement fan belt.
Depression Era style "make do" repair.

Now she's mechanically functional enough to drive, and the kids cheer and climb in every time I pull her out of the garage. (My driving has significantly improved too!) Now it's time for cosmetic work. I have begun to tackle the upholstery, which was also rather cobbled together, possibly in the 1940's. Re-padding the seats made a tremendous difference in riding comfort, right off the bat. Eventually, I'll get it all re-covered and then I can take a look at the exterior. The paint is badly crazed and there's some overspray from some other project that was too close to her fenders. Also, the paint is chipping off the cowl. I'm not sure that the paint is original. Close examination implies that the front fenders and the hood have certainly been repainted. The body might be original, but I don't think it's good enough to save. There will probably be a re-paint in her future, down the road.

The kiddos love riding in the park next door. Here we are, bugging the staff on a slow, snowy day.

Teaching friends how to drive is a fun time for all!

The interior was a little rough...

Tackling the repair of the front seats

Temporary covering for the back seat. (Original early 20th century handwoven wool Southwest Native American blanket makes a totally appropriate seat-cover!)

In the meantime, we'll be out driving every nice day that we can! Stop by sometime for a ride, or if you're really brave, a driving lesson!!
Happy trails! See you down the road!


Monday, March 12, 2018

Books Every 20th Century Motor Camper Should Read!

This winter has been a tease. Occasionally it has gotten warm and sunny enough to be outside, but usually on a weekday. As soon as the excitement starts flowing in anticipation of Spring, Winter has been quick to close her frozen fist around my desires for the open road. C'est la vie! Often I've opened the garage doors and found the poor old cars unwilling to cooperate with my completely unreasonable suggestions of driving in the snow, though I have gotten out a few times and they have yet to forgive me for it.


On the less cold and dreary side of things, this provides ample time for READING! The wonderful thing about re-creating the early 20th Century, is the plethora of research material available. Photographs of everyday life are abundant and many are available online in free archives. It's wonderfully easy to "get it right". However, as I've often said, a picture may be worth a thousand words, but it doesn't say all of them! Cue the book! Family sport camping as created thanks to the automobile may actually be America's first family hobby. As such, many books were written on the subject during that period. Imagine having the opportunity to read a book about what to wear, what to take, how to use it, and where to go, all written in the actual time-period you're looking to recreate? Guess what? It actually exists!

This "holy grail" of a book is called "Motor Camping" and it was written in 1923 by John C. Long and John D. Long. So you might think that this incredible magic tome would be pretty rare and expensive, right? Wrong! It is available for free online in a variety of formats right here! There is no excuse to not do your research. It's free and easy! This book is an absolute must-read for anyone who is interested in recreating the early 20th Century world of sporting and pleasure camping, even if you don't have a period automobile. There is a wealth of information here. (And if you REALLY need an original print copy, they range from $75-$100 on average)


The one thing that Long and Long don't give their readers is anecdotal experiences. Occasionally they'll illustrate a point with a little side story, but there are a lot of experiences and hardships that early sportsmen and women had to overcome that are not described here. Fortunately, there are many other books for that!


I will start with what I consider to be the best of the personal memoirs of motor camping. It is a gutsy story of a once in a lifetime opportunity for a young lady to travel across the USA in a Model T Ford with her best friend and her friend's husband as companions. The adventure is told from the young lady's perspective in a series of letters home. They camp every night and see wonderful sights, and have a wide array of adventures. She often describes herself sitting in her tent at dawn, writing about the previous days' events, so the memoir is as fresh as can be, unlike other accounts where the story was re-told much later after the participants returned. This book is pure and unadulterated. The book was published in 2003 by William Purser and Fred Noegel, Jr who edited the collection of letters and newspaper clippings into the book "The Auto Gypsies". Once you get past the introduction chapters that give a little background history and set up the story, the rest is the original letters as they were written in 1923. It is a delightful read and certainly holds the attention, as Miss Pansy Deese was an excellent and prolific letter-writer! This book is available as an e-book and on Kindle.


Next on my list would be "Motor Camping on Western Trails" by Melville F Ferguson. In this yarn, Ferguson recites the adventure of taking his entire family, including his in-laws, camping in two vehicles for a YEAR! They travel all over, meet lots of wonderful people, and see the last of the great "Old West". Eventually they end up in Hawaii, making them the farthest western motoring adventurers of their time. The book was published in 1925, but the adventure occurred in 1923. It would be interesting to know if they ran across the path of Miss Pansy Deese and the Noegels on their trip! Unfortunately, this book is out of print and copies are expensive, but your local library may be able to acquire a copy for you. This book is a delight to read!

Emily Post's 1915 Mercedes Simplex was a poor choice for the American road trip!

Equally enjoyable, but of a totally different nature, is Emily Post's (Yes, of Miss Manners fame) 1915 adventure, "By Motor To The Golden Gate". Ms. Post admits to making only one mistake, being that she took a 1915 Mercedes Simplex across the USA, which was not well-suited to the American roads, being overpowered, made with less common parts, and too low to clear the rough ruts in the unimproved wagon trails. She admits that they would have had much more fun in a flivver in spite of the social consequences. Ms. Post's adventure was less "roughing it" as they only camped one night in the desert when no hotels were available. Some parts are a little slow, as she is also reviewing the hotels she stays in along the way. However, one incident turns out to be an exceptionally exciting tale with as much action as you'd expect from any adventure novel! It is certainly a fun book. It is also available as an e-book and reprinted as well.


Next, we'll look at a book that is very close to home. Theodore Drieser's 1916 memoir of a road trip back to good 'ol Indiana, titled "A Hoosier Holiday" reads much like a tale of middle-aged men walking the line between trying to recapture their youth, and reminiscing about days long gone. They are fairly carefree and they flirt with female motorists, complain about young people, and talk about how the small towns have changed. One of the best things about this book is that they mention every single town they pass through, so it's easy to trace their route on any mapping app, which is kind of fun.


Now, if you read my blog post last month about 20th Century foodways, you'll know that when I give you a list of great stuff to try, I have to throw in one really bad one... I would like to nominate "It Might Have Been Worse: A Motor Trip from Coast to Coast" by Beatrice L. Massey for the prize of Worst Motor Camping Memoir. Their adventure "could have been worse", but their recounting of the trip couldn't possibly have been worse. I think a lot of this stems from the fact that, unlike many of their contemporaries, who were average, or middle class, these motorists are quite wealthy, and as such, I don't think they were prepared for the difficulties that come with this form of travel. As the title of the book suggests, the author focuses heavily on everything that she perceived as going wrong on the trip. Most of their misadventures were pretty trivial. At one point it rained on a day they had planned a big, swanky picnic, and they were afraid that their special shrimps and other treats would spoil, and so they picnicked in the hotel room, which disappointed the group. Other misadventures include poor hotel service, and utter disgust and dismay at the gaudy architecture of the homes in Chicago's wealthy suburban neighborhoods. It is a tome of complaints. It's worth reading, if you've already read everything else on this list and you're really, really bored, otherwise, save it for never.


There are many other good books out there to read. One that I would love to get my hands on, is "The Family Flivvers to Frisco" by Frederic Franklyn Van de Water. Like "Motor Camping on Western Trails", this book is out of print, but it tends to fetch a slightly higher price for a good copy. When I have time, I'll see if my library can borrow one for me. If you need more yet, I can highly recommend "Trails Begin Where Rails End" by Albert Manchester. Though this book was written in 1987, it is an excellent look at a variety of wonderful aspects of motor camping. The book is a little disjointed, as he starts out describing his own adventures in the late 1940's, then jumps around to the Indian Detours, an excursion service that, for a fee, would take you through Southwestern New Mexico in an automobile to see the sights and indigenous peoples, and then launches into a complete history of Pancho Villa's 1916 raid and the subsequent Punitive Expedition. It's an odd book, but fun to read and easy, as each chapter could be a short stand-alone story.


There are also many great fiction novels to read. Some pertain very little to motor camping, though reading fiction of the period gives excellent insight into how folks talked, thought, and lived. At times, it can be very fanciful, as this was an era of great change and a "sky's the limit" attitude. Anything was possible. This led to novels that we'd now consider to be science fiction, or even "Steampunk" in nature. One caveat though - While I have not seen this mentality much in the memoirs of actual events in the books listed above, most of the fiction of the period does have a slight racist bent and natural conservation is not a concept they often think about. Understand what you're getting into and don't be shocked. I think the Tom Swift novels may be one of the worst perpetrators of this. They are still fun to read, if you work around the junk. Books written by women tend to have less of these aspects. The "Motor Maids" series by Katherine Stokes is excellent and a lot of fun. It's written for young adults, particularly females, but even this middle-aged guy enjoyed them in spite of all the tears because the popular girl is mean... Many of these old novels are available for free, or in the case of Tom Swift, you can get 25 for .99 cents on Kindle. You can also find old copies or reprints just about anywhere, as millions of copies were sold before TV took over the entertainment world.

By Diliff - Own work, CC BY-SA 4.0, https://commons.wikimedia.org/w/index.php?curid=42693401

Now, the weather forecast says I have at least another week to snuggle under a blanket with a cup of coffee and a good book, so I think I'll go do that while I daydream about warmer weather and my own adventures right around the corner! Happy reading, folks!

Thursday, February 15, 2018

Early 20th Century Foodways

Food! Done well it can be the perfect salve for a rough-weather weekend!


Over the past weekend some friends and I went motor camping and the weather was less-than-perfect. Sometimes all you can do is hole up in a warm tent and eat lots of good stuff! Today I intend to explore some of those recipes as well as a few others that are great, and one that is far less desirable.

It was cold and wet, so we spent a lot of time eating and socializing in the warm mess tent!

Good times and good food go very well together! Keep your crew happy with good eats!

The early 20th Century brought with it lots of changes in food. Pre-packaged, commercially processed foods were the latest craze and would set the tone for the next 100 years. When they first started, packaged foods were slightly more wholesome than they are now. However, later on, short shelf lives led to the addition of more preservatives and processes changed to the point that today, many products are barely recognizable as food. One of these products that we chose to reproduce were "Cheez-It's". Originally invented in 1921, they hit the market in 1922, produced by the snack manufacturers, Green and Green Bakers. They were an immediate hit. Later on, the recipe was sold to Kellogg who produces it under the "Sunshine" snack brand to this day. Here is the recipe we used. (Note: These were made at home prior to the camp.)

Original 1922 Cheez-It packaging 

"Cheez-It Crackers"
"A Baked Rarebit"

1/2 Lb Extra-Sharp Cheddar Cheese
1/4 Cup Butter
1 Teaspoon Kosher Salt
1 Cup Flour
2 or 3 Tablespoons Ice Water

Grate cheese. Mix well with butter and salt. (Make sure the butter is at room temperature. I recommend using an electric mixer, as it's hard to get it all properly mixed by hand.) Add flour. Continue mixing until mixture is "pebbly". You'll know what this means when you see it. Slowly add 2 tablespoons of ice water while forming mixture into a ball. Use a little more water as needed until you can form a dough that isn't crumbly. Dough should be smooth. For a completely period approach, you can wrap dough in a lightly dampened towel and place it in your icebox or monitor top refrigerator. The modern solution is to wrap it in plastic wrap and refrigerate. Either way, chill the dough for 1 hour. After chilling, roll the dough out about 1/8" thick. The thinner it is, the crispier they will be, but the less time they'll take to bake. Cut dough into 1" squares. This is probably the most time-consuming part. You can use a butter knife, pizza cutter, or pastry cutter to accomplish this. Perfection is not necessary. For the perfect "look", use an ice pick to poke a hole in the center. If you don't care about them rising a little more or having unsightly bubbles, then don't bother with this additional time-consuming process. Place on a baking sheet (there's no need to grease it because they have a ton of fat that keeps them from sticking) and bake for 15-17 minutes as 375 degrees. Allow to cool and enjoy! I recommend at least doubling this recipe. I made a triple batch and about a half dozen people demolished them in about 2 hours. They are incredibly good.

This is what I mean by "pebbly".

This is about the consistency you want the dough to be before chilling.

Freshly baked!

I keep them in a small tin, but eventually I might try to reproduce the above box!

There are a plethora of old cookbooks from the 19-teens and twenties. It seems that nearly everyone from big name chefs, to passenger railroad and ship lines, to church and civil organizations were producing various cookbooks. These can be found both as originals and re-prints online just about everywhere. I have a few and they have supplied me with endless recipes to try. One of my favorite recipe books is "A Thousand Ways To Please A Husband", published in 1917. (Yes, it's just a cookbook!) The book is written for newlywed housewives and features recipes for a complete meal with a situational story leading to the recipes. It covers a year's worth of seasonal recipes. I highly recommend this cookbook! The recipes are spot on and easy to follow. One caveat though, is that being written in 1917, there are few references to modern equipment. Recipes may say to "bake in a quick oven" or "place over fire" with the assumption that you, the housewife, will know what these things mean. I have had to convert a lot of this for my "man brain", into modern equivalents. Generally if baking breads, you'll want a "quick oven", which is anything over 400 degrees. For hard outer crusts and soft centers, up it to about 500 degrees. For most other things, about 350 degrees is acceptable.

Antique and reproduction cookbooks are your best source for period recipes, however, camping books and BSA handbooks have a lot of great camping-related offerings as well. There are a lot of recipes that are digitized online as well.

This leads us to my next recipe selection, which is for biscuits and sawmill gravy! This was a popular Southern dish in america and was as common for breakfast as for dinner. Sawmill gravy gets its name from the massive logging camps in America, post-Civil War. I have been unable to find an actual recipe for sawmill gravy, but hundreds of references to it, usually accompanying a recipe for biscuits and the directions are frequently, "make gravy in the usual way". Therefore, I have used a recipe for sawmill gravy that has been handed down through my wife's family for generations. I think it is acceptably "the usual way." The biscuit recipe is from "A Thousand Ways to Please a Husband". It is called "Emergency Biscuits", because it takes very little effort or prep work to make them as they are just a drop biscuit, however, they are incredibly good. The simple effort and limited ingredients make them absolutely perfect for motor camping. At our camp, we ended up using whole wheat flour, because that's what we had. I don't recommend this, because it makes the biscuits and gravy really heavy. They are quite filling, so if you have a lot of hard-working men in a logging camp to feed, then maybe whole wheat is the way to go, however, whole wheat flour was almost gone as a product by the 1920's. I recommend all-purpose flour. Do not use self-rising flour!

Emergency Biscuit

2 Cups Flour
1/2 Teaspoon Salt
4 Teaspoons Baking Powder
3 Tablespoons Fat (Lard or Butter)
7/8 Cup Milk

Mix dry ingredients and cut in fat. Add the milk. (Add a little more milk if needed to get a good, sticky consistency. You want them to have to be shoved off of a spoon) Drop by spoonfuls on a buttered pan, placing 1" apart. Bake 12 minutes in a hot oven. (I baked mine 15 minutes in a 1908 Boss range-top oven that I heated with propane. Temperature range was 400-425. This recipe makes about 14 small biscuits. You'll need at least a triple batch to go along with the gallon of gravy in the next recipe.)

The 1908 Boss Range-top Oven. Since I don't have a kerosene stove, I had to opt for propane, which is not period, but not very intrusive upon the period atmosphere.
Finished biscuits! 

Sawmill Gravy

1 Lb of Sausage (You can use any sausage. You can also use 2 lbs for meatier gravy.)
2 Cups of Flour
1 Gallon of Milk
3 Teaspoons of Salt and Pepper.

(This makes a lot of gravy, so consider cutting it in half for a smaller group.) Fry sausage in a skillet. Add flour and brown slightly in the grease, giving the sausage a good coating of flour as well. Add salt and pepper. (I used 1 1/2 teaspoons of each, but basically to taste.) Put this mixture in a large pot and add the milk. Stir constantly on low heat until it thickens. (Note, this will take a very long time. I recommend having a helper stir while you make biscuits. You must stir constantly to avoid lumps in your gravy.)

Frying the sausage for gravy. Don't drain the grease off! You need it for your gravy base!

Another great breakfast item at camp is flapjacks! They are frequently mentioned in camping and motoring books of the period, and I can certainly see why! They are incredibly easy, require few materials, and are very tasty! I searched through several recipes to find something that was simple. Now, you can use a pre-made dry pancake mix. Pillsbury Pancake Flour hit the markets in the early 19-teens. "Bisquick" was first marketed in 1930. However, I have tried both at camp and determined that the following recipe is not only cheaper and tastier, but actually just as easy to use! Unlike many other recipes, it does not require milk, so the only "wet" ingredients you need are eggs and the water you already have for camp needs. I highly recommend this recipe, whether you make it at camp, or mix up the dry ingredients ahead of time for ease of preparing. This recipe comes from a 1927 cookbook, titled, "My Most Successful Recipes" by Lulu Thompson Silvernail. I have made these many times at camp and at home and they never fail to please.

1920 ad for Pillsbury's Pancake Flour

Water Batter Cakes

1 Egg
1 Cup Water
1 3/4 Cups Flour
1/2 Teaspoon Salt
1 Tablespoon Sugar
2 Teaspoons Baking Powder
2 Teaspoons Melted Butter

Beat egg light, to which add water. Sift flour, salt, sugar, and baking powder together and add to wet mixture. Melt butter and add, beating mixture hard for one minute. Bake on soapstone griddle or slightly greased ordinary griddle. (Note, I have never used a soapstone griddle. Sounds like it might be tricky to take camping for fear of breaking it. Also, an ordinary cast iron griddle is heavy and bulky. I have had absolutely no problem cooking these on a sheet-steel skillet or an enamelware skillet, however, be sure to reduce your heat a little. Low, consistent heat works best for flapjacks and grilled cheese sandwiches!) I recommend serving these with maple syrup and some fried rashers of bacon or ham.

Rashers of bacon or ham add nicely to any breakfast, or other meals for that matter! 

Now that we've covered snacks and breakfast, let's talk about other meals. Most of the motor camping books of the period recommend eating a very heavy breakfast, snacking through lunch (because you're driving) and eating a good, wholesome dinner. In Long and Long's 1923 book, "Motor Camping", they recommend adopting the "Indian" method of eating two large meals a day, morning and night, and then eating smaller sustaining snacks throughout the day. "Such a meal consisting of one or two eggs or cottage cheese, a few nuts, whole wheat bread, olives, lettuce, radishes, tomatoes, apples, pears, or peaches, with some dates or raisins, will supply the body's needs and have as sustaining qualities as meats and rich desserts."
For the end of the day, here's a good hearty soup that can be enhanced to make a full meal. One-pot meals are really ideal for camping. This recipe comes from Lulu Thompson Silvernail's 1927 cookbook, "My Most Successful Recipes".

Cream of Potato Soup

3 Medium Potatoes
3 1/2 Cups of Rich Milk (Use whole milk)
1 Tablespoon Flour (Thickening agent)
3 Tablespoons Butter
2 Tablespoons Grated Onion
1 Teaspoon Salt
1/8 Teaspoon White Pepper
Dash of Cayenne Pepper
2 Tablespoons finely chopped Celery Hearts

Peel and boil potatoes until tender and run through a siene into a saucepan. (Or you can just mash them really, really well) Add milk to potatoes. Mix flour, butter, grated onion, salt, peppers, and celery together and add. (Note, celery and onion should be very fine and cooked tender) Place over fire and cook slowly until mixture thickens, stirring constantly. (Note, to make this soup into a whole meal, include a cup of chopped ham halfway through cooking, and serve with a good soda bread, corn bread, or biscuits.) 

Some of my cookbooks are modern re-prints, while others are fragile originals, so for taking into the field, I opt to write out my recipes on period style recipe cards. This way, if they get ruined by grease or liquid, I haven't damaged my book and it keeps the appearance of my camp kitchen looking nice and historically accurate. I also try to make an effort to re-package all of my materials in period wrappings such as waxed paper, kraft paper, or glass bottles.

Write recipes on cards to take camping. Don't risk damaging a whole book around grease, liquid, wind, fire, and mud!

Packaging your foodstuffs properly makes a big difference and keeps the camp looking nice while you cook!

In addition to great foods such as the ones listed above, there are many processed foods that can be added to your camp supplies. Tin cans of peaches, succotash, and even certain Campbell's soups can be re-labeled with printable period labels and used as they are. Google is an excellent resource for finding printable labels.

Printable can labels are available all over the internet. A simple Google search will reveal plenty of options.

I like to keep my cold food supplies in a Hawkeye Refrigerator Basket. These can be acquired relatively affordably at antique stores and on eBay. They are great for a period-correct cooler and most are in excellent usable shape because they were so well built to begin with. They were patented pretty early, so they're appropriate for pretty much everything we do. I have one that's a full-size picnic basket, and another one that is narrower and designed to fit on a car's running board.

Hawkeye Refrigerator Baskets are the perfect period-correct cooler!

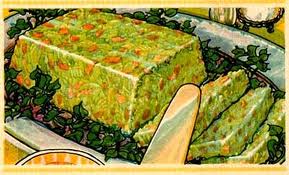
Now that we have your mouth fully watering and your stomach rumbling, here is the antidote! This recipe is for a wildly popular dish in the teens and twenties, though for the life of me, I can't imagine why... This is sure to ruin your appetite! This one comes from "A Thousand Ways To Please A Husband", which might need to be re-named to "999 ways to please a husband" for the fact that this recipe is included... Here is the inappropriately-named "Perfection Salad"!

Perfection Salad

1 Tablespoon Granulated Gelatin (Unflavored Jell-O)
4 Tablespoons Cold Water
4 Tablespoons Vinegar
1 Tablespoon Lemon Juice
1 Cup Boiling Water
4 Tablespoons Sugar
1/2 Teaspoon Salt
2/3 Cup Diced Celery
1/2 Cup Shredded Cabbage
1 Green Pepper, chopped
2 Tablespoons Pimento, Cut Fine

That's a wiggly lump of NOPE!

Add cold water to the gelatin, and let stand for five minutes. Add the boiling water. When thoroughly dissolved, add the vinegar, salt, lemon juice, and sugar. Mix well. Add the celery, cabbage, green pepper, and pimento when the jelly begins to set. Pour into a mould that has been dipped in cold water. Allow to set in a very cold place for one hour. Serve with salad dressing. (Some recipes also call for adding mayonnaise to the gelatin.)

I hope you enjoy these recipes and I wish you the best if you try "Perfection Salad". I'd love to hear about your recipes that you've tried as well!

Happy Motoring!!